Tuesday, April 26, 2011

Gas is going up

Throttle by...

...wire cable!

Ran across this article on Racing On The Cheap about running a throttle cable instead of the factory swivel linkage set up. The factory linkage and its many joints creates binding and slop that reduces the feel of the skinny pedal. Another major disadvantage of the factory set up is that it connects the engine to the firewall causing unwanted throttle input from engine movement. Running this will also allow me to simplify the engine bay even more.


Valve cover color

Taking the valve cover along with a few other things to get sand blasted and powder coated. I originally wanted to do the valve cover in wrinkle black but now I'm leaning more towards a wrinkle red finish. Either way I want it to look like it could possibly be oem.

For reference:


Monday, April 25, 2011

Long block assembled.

Dustin wanted to help put the engine together since he's never done it before and I wasn't going to turn away some free help. The machine shop did a great job and everything went together with out a hitch.


With the long block all put together we call it a night. Still waiting on the new bolts, and a few other things and the engine will be ready to go. I still gotta rebuild these bad boys below, but that's for another day.


Sunday, April 24, 2011

Also...

The car looks like this. All that is left is to drop the tank and remove the remaining hard lines, and then she's ready for blasting.

Swap meet finds

Made it out to the annual swap meet in New Braunfels, TX. Lot's of cool old stuff trading hands, including some future project cars. It was mainly American car things but I still didn't come home empty handed.

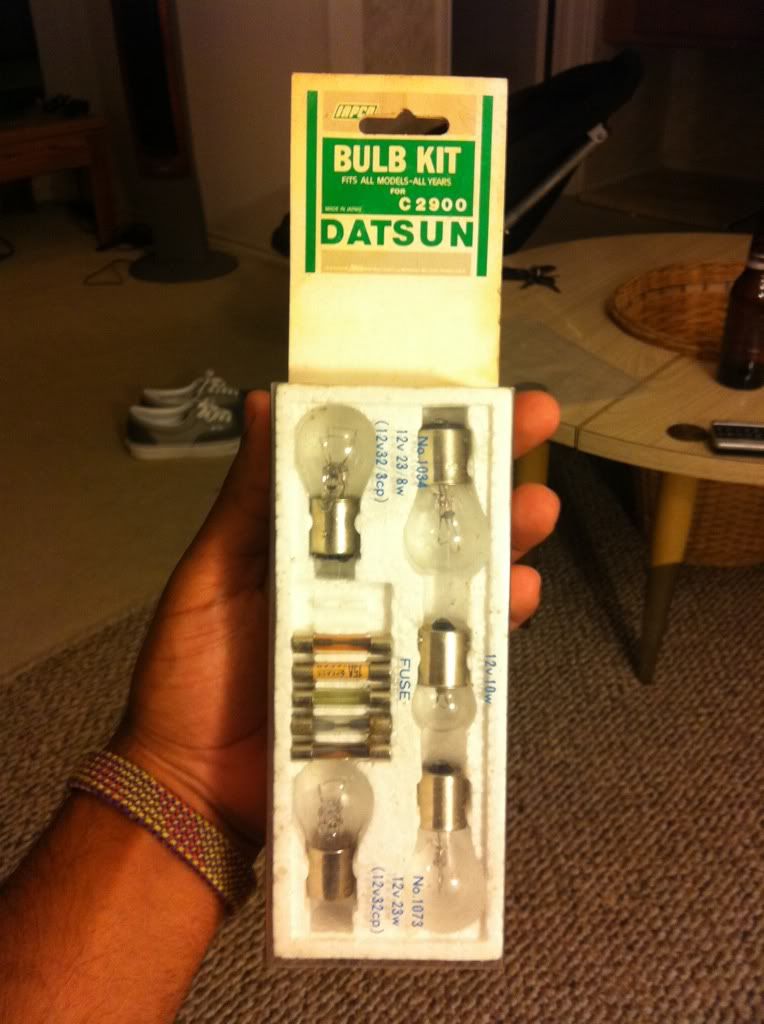
My friend had a vendor spot and he actually had these for sale. Never used Datsun spare bulbs and fuses kit.

It'll make for a good conversation piece to leave in the glove box.

What I'm really excited over however is this 1975 Texas dealer plate. It's in really good condition. The fun thing is that I'll be able to register the car with these plates.


I will update....

Soon! My mac wasn't charging but that has been resolved. With Dustin's help we got the long block all assembled. I also made it out to a good size swap meet and snagged some goodies. Stay tuned.

Monday, April 18, 2011

Triumph on film

My very good friend Justin Leveritt came into town last weekend. Toting around only his little film camera he was able to capture some very cool images.

Here is just a sample of the pictures. Justin is one talented fella and you can see more of his work on his new site The Layered Cake.

Sunday, April 17, 2011

Fox body coupe!

I always say there is no greater feeling than driving a project home. With every glance of the rear view mirror more ideas come to mind. This time however it wasn't for me but my roommate Dustin. I've always talked about building a LX fox body mustang, so it's nice that I'll get to be involved in this car.

If you're not familiar with these cars they originally came with mighty 4 cylinders. However a good ol trusty Ford 302 will most likely make its way under the hood. Dustin doesn't have the most experience with cars, but he's one of the hardest working people I know. So I'm certain his work ethic will show in this car.

Stay tuned this little ride will be something special.
The happy new owner!

Thursday, April 14, 2011

Headache...

So stripping out those threads in the head wasn't the end of the world. I used a helicoil thread repair kit. It's pretty simple, you just drill out the damaged threads and tap the hole to a bigger thread size. The picture below shows the insert. The insert allows you to reuse the original bolt as if nothing was ever damaged.


Here's the head assembled. I'm using a Schneider 460 lift and 270/280 duration camshaft along with matching Schneider valve train.


It's important to make sure to have a proper wipe pattern on the rockers along with the right valve lash. Either one being off could cause some serious damage. Speaking of preventing damage, here's all the ARP hardware that came in.


Tuesday, April 12, 2011

AHHH!! A typo are you kidding me?!

So to aid me in putting the engine back together I had been using this piece of fine American literature:
It's honestly great, very descriptive and really simple to find what you need. Very handy to have around in order to look up a quick torque spec or tightening sequence. It however let me down, I would even venture to call it an EPIC FAIL.
Clear as day the manual states the cam tower bolts should be torqued to 30ft/lbs. I ended up striping out 2 threads!!!! I check another manual and on hybrid Z and those bolts are to be torqued to 7ft/lbs! Dammit!
So next post will be on thread repairs....yay!

However even after this I'm still ordering this book by the same folks. That will better help me with carb and cam tuning.

Thursday, April 7, 2011

Almost nothing on her...


Now that I got your attention, here is the current progress on another fine lady:


All that's left is to drop the fuel tank, and pull all the brake/fuel lines. Once that is done she'll be all ready for sand blasting and sealing primer.


Friday, April 1, 2011

Engine painting

The Z engine is back from the machine shop. Had the following done:

Block bored and honed .040(1mm) over stock
Rods checked and micro polished
Crank balanced and micro polished
New pistons pressed on rods
Valve job (valves regrind, seat resurface, new seals, new Schneider springs and retainers)
Block and head resurfaced

It was a nice sunny day with little wind so I decided to go ahead and paint the block and head. My buddy Zach was over at the shop and gave me a hand.

Everything taped off and ready for primer:

Coat of primer:


Here are the results:


I usually use VHT paint but they were out so I used this. Hope its just as strong:


Oh and did I mention Im running flat-tops:


Good progress for the day. I also cleaned out the garage which it has been needing it. On another note if you live in Texas you need to check out The lone Star Round Up hot rod and classics show in Austin!!